So you want to make a 3D print from a 2D image. Maybe you saw the documentation of my "Sculpting Shadows" project. Maybe you got here through some creative Googling. Regardless, this page is for you. There are probably other ways to do this, but this is how I did it. I'd love if you let me know what you learn through your own experimentation!
The basic concept here is that you'll be using a 2D image (solar print, painting, photograph, digital art, drawing, whatever) as a depth map to create a 3D model and then 3D printing it. For those unfamiliar with depth maps, essentially software interprets the luminance data of a pixel (how bright it is) as depth information. Depth maps can be used for a variety of applications, but in this case the lightest parts of the image become the more raised parts of the 3D model, and the darker parts become the more recessed parts.
STEP 1: MAKE YOUR 2D IMAGE
Any image will technically work, but if you want a 3D model that isn't a fuzzy, noisy mess you want to try to create an image with big blocks of similar tones. Thin lines or small spots will create extreme peaks and valleys that might not look great when modeled or printed. The depth information will come from the luminance values of each pixel: the closer to white a pixel is, the more it will be raised, and the closer to black a pixel is, the more it will be recessed (or you can choose to invert this relationship). So how do you want to create your 2D image?
DRAW IT?
The most basic way to do this would be to use a black marker to draw some shape on white paper (or the digital equivalent), which would give you a two-level model: raised and not. If you have some mid-tone markers you can incorporate those to get more levels.
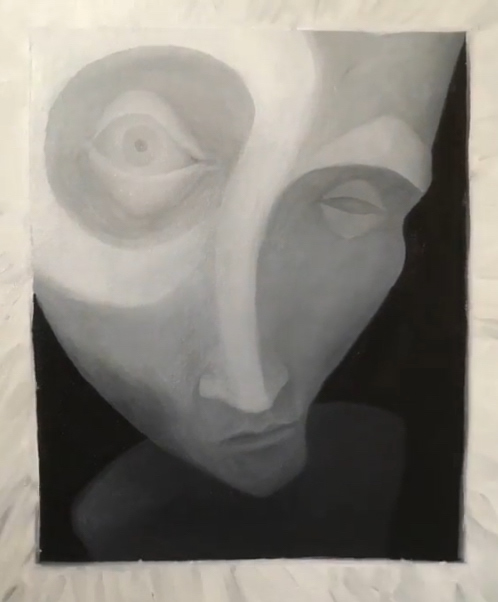
PAINT IT?
Painting for 3D models is really quite fun! Compared to drawing you can more easily get gradients, which will create smooth slopes in your model. For me, this requires a lot of back and forth between painting and converting to 3D to see how the model is shaping up. Creating form in this way is a workout for the gray matter.
CYANOTYPE IT?
There are a few things to keep in mind if you are using cyanotype solar prints for this process:
1) Objects that are more three-dimensional will lead to more three-dimensional prints. Super flat things that create a stark contract between the exposed and unexposed areas of your print will lead to a 3D print that is essentially two levels: the flat background and the raised foreground. This may be what you want for your project, but if you want 3D prints that have more curves and bumps and ridges and ravines, pick objects that don't lie flat on your print and therefore allow more light to leak in around their sides to create midtones in the solar print.
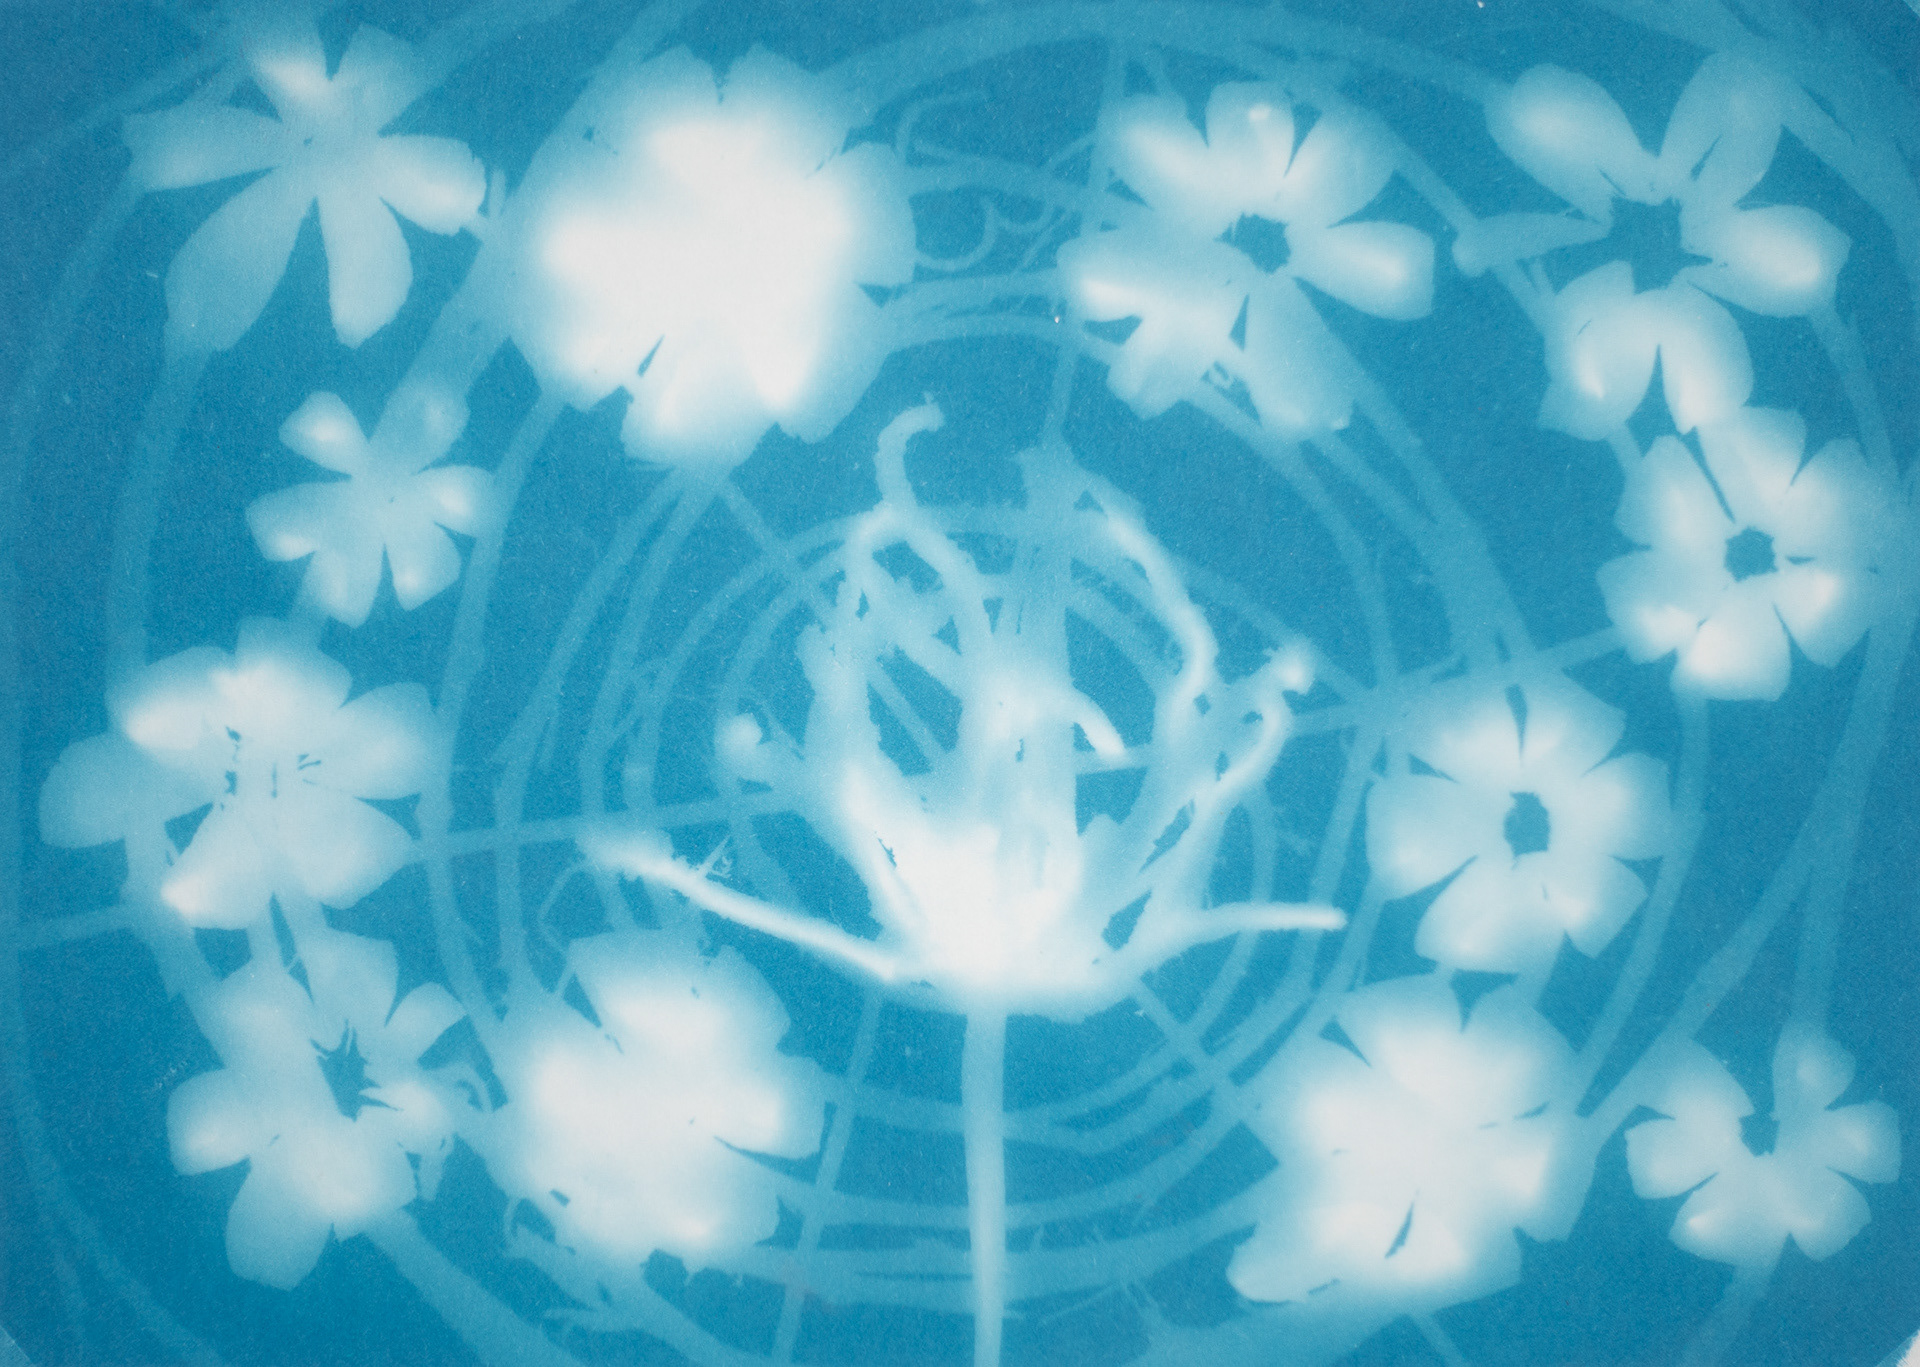
2) You can also create midtones by creating distance between your cyanotype paper and an object. This can be done by stacking objects (the "background" spiral in the cyanotype above was stacked on top of the other objects), or finding another way to suspend the object over the paper during exposure.
3) Another way to add midtones is to vary the time an object is casting a shadow on the cyanotype paper. If you add or take away an object partway through your exposure, it will still appear in the final image but will be a midtone. You could even take away an object and add a new one in its place, which would make the areas where they intersect a high level, and the areas where they don't intersect a mid level.
4) Look out for small particles. When I did this I was using organic matter (plants, seedpods, etc.), and it was easy for a little piece of matter to flake off onto my solar print during exposure. This would create a bright dot which might not look like much in the 2D print but would be a distracting spike on the 3D print.
5) Pick the right solar paper. I used two different papers, PAPER 1 and PAPER 2. PAPER 2 was larger and had a more pronounced texture. This texture carried through to the 3D print. I actually like to way this particular 3D print ended up looking, but in general I try to avoid textures so that the structure that comes through in the 3D print is more authentically representative of the shadows cast by my objects.
6) For best results, let the solar print fully develop. I found that my prints continued to deepen in color for at least 24 hours after exposure. You want the maximum dynamic range (difference between the image's darkest and lightest bits) possible to create a 3D model with the greatest fidelity, so that extra deepening is useful. That being said, I made most of my 3D models from prints that had not fully developed yet because I didn't realize they hadn't fully developed yet, and they look pretty good.
I go into more detail about solar printing techniques I have tried and show how they translated to 3D on the "Sculpting Shadows" page.
STEP 2: TAKE A PHOTO OR SCAN OF YOUR IMAGE
If your image isn't already digital, a flatbed scanner is probably ideal for capturing your image, but I've only had access to a camera when doing this and it works fine. The important factors to consider at this stage are distortion and visual noise. If you are using a flatbed scanner you don't have to worry about either of these, and can move along to the next step.
If you want your eventual 3D print to honor the geometry of your image, you want to minimize distortion. (You might be into the distortion, and that's a cool idea--you can skip this section, you rebel.) Distortion can come into play in this step if you use a camera with a wide angle lens and photograph your image at close range. A phone camera has a pretty wide angle lens, so if you are using your phone camera I would recommend taking your photo from a little farther back. Pay attention to the edges of the paper as displayed on your screen--notice when they bow out and are no longer parallel to the edges of the phone screen. Back up until they are parallel. You can crop out the space around the print later. If using a non phone camera, use the longest lens you have or zoom in all the way (unless your camera has a digital zoom that reduces image quality).
Noise is the real killer here. Subtle variations in brightness from pixel to pixel can create a very "fuzzy" 3D model. You might be able to find a way to use this effect for an interesting model, but I haven't. So you want to minimize the grain in your photo. How do you do this? Photograph your solar print in bright, even light. Outside in even shade on a sunny day is ideal. If you know about ISO settings in your camera, set that ISO as low as you can. Use a flash if you like, so long as it produces an even light across the image (look out for light falloff around the edges of the image, particularly if you are photographing at close range).
STEP 2.5: 3D TEST RUN (OPTIONAL)
You're going to want to make some adjustments to the image before converting to 3D, but if this is your first time doing this I'd recommend actually skipping to STEP 4 to see how your image translates to 3D without any pre-processing. Then come back to STEP 3 and you'll be better able to visualize how what you're doing affects the final model.
STEP 3: GET THAT IMAGE INTO PHOTOSHOP OR GIMP!
If you don't have Photoshop or GIMP yet, you can download GIMP here for free. If you get hung up on anything, please contact me so I can help you and change the guide--you probably aren't the only one having trouble!
CROP IT
Open up your image and crop it down so that only the image you want modeled remains.
CONVERT TO GRAYSCALE
This is optional, but since the color information will not affect your model, I find it helpful to remove the distraction. I didn't do it in these example videos, though.
DE-FUZZIFY WITH THE MEDIAN FILTER
If you did the 3D test run, you probably noticed that the model was really "fuzzy," unless you are working from a very clean digital image. This is caused by camera noise and other fine textures that result in brightness variations between pixels in your image. In 3D, these variations cause the depth of the model to jump up and down from pixel-to-pixel. The main tool I use to get a smoother surface is the Median filter, which reduces the differences between adjacent pixels by assigning each pixel a value equal to the median value of the pixels around it. (Don't worry too much about how it works if that's not interesting to you. I used the Median filter for years without knowing exactly what it was doing.)
To get to this filter in Photoshop, in the menu bar select Filter > Noise > Median. In GIMP select Filters > Blur > Median Blur. The "Radius" setting tells the filter how wide a net to cast to calculate a median value for each pixel. In simpler terms: higher number equals smoother. The setting you'll want to go with depends on the size and detail of your image, but you're looking for a sweet spot where you lose harsh pixel-to-pixel variation but maintain the details of your shapes. Experiment! Try one setting, convert to 3D, notice the effects, undo and try a different setting. I found that I often needed to go higher than I thought to remove noise and I would still have good shapes. (For the curious, the images I used for the example videos here are about 4500x3000 pixels and I usually used a Radius value of 10.)
CLEAN UP ANY UNWANTED SPOTS
If you test out your 3D conversion again at this point, you might notice that the model is smoother overall but still has some unwanted spikes or dips. Look at your 2D image for any light or dark specks that stand out. The light ones are pretty common in cyanotypes, and could be the result of flecks of matter falling onto your solar print during exposure. Regardless, if you see some distracting spots you can remove them really easily with the Spot Healing tool in Photoshop (keyboard shortcut "J"), or the Heal tool in GIMP (keyboard shortcut "H"). If you need some help with that tool, here's a YouTube tutorial.
ADJUST YOUR LEVELS
Remember that the brighter a pixel is, the thicker the model will be in that spot. Think about how thick or thin you want the thinnest part of your model to be. The darker you adjust the dark areas in your image to be, the thinner they will be in 3D. Similarly, the brighter you make the whites in your image, the thicker those parts of the model will be. Anything that is absolute black we can remove from the model entirely, so if you want to make some 3D prints that aren't square, or have holes in them, that's how to do it. If you make your whites very bright, you will see a plateau effect--the thickest parts of your model will flatten out and will lack the bumpy texture of the rest. Honestly, if you don't want to remove the blackest areas of your image, you can probably skip this step.
To adjust your levels, in the menu bar in Photoshop select Image > Adjustments > Levels. In GIMP, it's Colors > Levels. Under "Input Levels," you'll see a bumpy histogram of your image, with three little gray triangles along the bottom: a dark one, a medium one, and a light one. If you drag the dark one to the right, it will make your darks darker (thinner); the light one to the left will make your lights lighter (thicker); and the medium one back and forth will adjust the brightness/thickness of your medium tones.
If you want to make your darks lighter (thicker) or your whites darker (thinner), adjust the triangles along the "Output Levels" line. A common problem I ran into when making these models is that the part of an object that was touching the solar paper during exposure would create a very bright white area, and then falloff quickly into darker blue (see the top middle seedpod shadow in the picture under the STEP 1 heading for an example of this). This would create spikes or thin raised ridges that I thought were incongruous with the whole. For these models, before conversion to 3D I would adjust the white level to make it darker while trying to keep the rest of the image at about the same levels.
There are a lot of ways to adjust the levels in your image, this is just one. If you want finer control than the Levels tool gives you, play around with the Curves tool (In Photoshop: Image > Adjustments > Curves. In GIMP: Colors > Curves) and see if you can tame that beast.
EXPORT YOUR IMAGE
Save your image as a jpg or png. In Photoshop select File > Save As and choose JPEG or PNG from the "Format" drop down menu. In GIMP choose File > Export As.
STEP 4: CONVERT 2D IMAGE TO 3D
I used to have a workflow on this page to do this step completely in Photoshop, but I've replaced it with this web-based tool because 1) it's free, and 2) it's a smoother experience and provides some additional functionality.
The web-based tool we are going to use for this part of the process is ItsLitho. This is ominously labeled "Beta," so it might go beyond a paywall at some point, but for the moment it does the trick. It's a tool meant for creating lithopanes, but it will work for our purposes as well.
I have problems downloading the model when using Safari, so I'd recommend some other browser.
GET STARTED AND UPLOAD YOUR IMAGE
Go to itslitho,com and click the "Get Started" button in the upper right. Then click the "UPLOAD" tab and upload your image.
PRELIMINARY ADJUSTMENTS
Click on the "MODEL" tab. There's your model! Kinda. Since this is a tool made to model lithopanes, and we're not making a lithopane, there are a few things you're going to want to change right away so you can see what you're working with. First, under the "Frame Options" settings on the left, click the "Frame" pull down menu and select "No Frame," unless you want one. Second, navigate to the "Model Options" settings and under the "Lighting" pull down menu select "No Light." Lastly, navigate to the "Image Options" settings and uncheck "Positive Image." You can zoom into your model by scrolling up and down and click and drag to change the angle.
PLAY WITH YOUR SHAPE OPTIONS
Now it's time to really shape your model.
Shape: Plane is the default, but your image might do something cool if modeled onto a different shape!
Width and Height: Not sure this really ends up mattering all that much, but go ahead and set these to approximately what you'd like your 3D printed output to be.
Min and Max Thick: Set to whatever you think looks nice for your model. The slider on the Max Thick setting only goes up to 20mm, but if you want it thicker than you can click the number and type in something bigger. If you want the thinnest parts of your shape to not print, go ahead and click the measurement and type in 0. You will still see them in the model, but when you slice the image for 3D printing it should drop out because it's too thin to print.
You might be getting results you don't like (too fuzzy/spiky?) and need to go back to your image editing program to make some changes to your image, or you could try some basic adjustments in the “EDIT” tab. When I've done this I've ended up doing a lot of back and forth between the model and the 2D image to get it as close to just right as I can.
DOWNLOAD THE MODEL
Once you're happy with the shape, click the "DOWNLOAD" button in the bottom right, and select "LITHOPANE + ATTRIBUTE." The download should start automatically, though I have had trouble in Safari with it not downloading correctly. If you run into that, try a different browser and hopefully that'll solve your problem.
STEP 4: PREPARE THE MODEL FOR 3D PRINTING
I'm not going to go into too much detail about how to prepare an .STL file for 3D printing. If you have a 3D printer, you are already familiar with the process. If you're using someone else's, they can show you the ropes or you can refer to one of the many guides available on the internet. Try to import your .STL file directly into Slicer or whatever 3D printing software you're using. Slice it up and keep a close eye out for anything hinky. Sometimes these models just work, in which case print away and rejoice! Sometimes, though, the models that result from this process have some problems that require a little fixing.
One such error I have seen in PrusaSlicer is an "empty layer" error. An easy fix for this is to increase the "Print Settings" size--for instance from 0.10mm to 0.15mm. I don't have experience with other slicer programs, but if you run into any problems let me know and I'll see if I can help you. I'll also add the fix to this page to help others.
STEP 5: 3D PRINT THE DARN THING ALREADY!
Alright, you did it! These models tend to end up with lots of little stringy spiderwebby filament strands on them--a heat gun does a pretty good job of melting these away, but be careful not to heat the model too much or it'll warp (though that can be cool, too!). If you've no heat gun access, maybe a quick once over with a lighter? Or a stiff brush? A little sanding probably wouldn't hurt, either. There are lots of ways to finish 3D prints. Google away!